
Toe Kick Moulding: The Complete Guide to Sizes, Materials & Installation
Discover how the right toe kick moulding can protect your cabinets, improve ergonomics, and elevate your kitchen's finished look. Your essential guide to this often-overlooked detail.
What is Toe Kick Moulding? Toe kick moulding, also known as a toe kick baseboard or kitchen plinth, is the recessed base panel that runs along the bottom of your base cabinets. It creates a comfortable 3 to 4-inch deep space for your feet, allowing you to stand closer to the countertop while working.
Beyond ergonomics, this moulding serves a critical protective function, shielding the bottom of your cabinets from kicks, scuffs, and cleaning mops. It is the finishing touch that transitions your cabinetry from a floating box to a built-in, furniture-quality installation. For a cohesive look, many homeowners pair their toe kick with other finishing details like crown molding for kitchen cabinets.
Why Toe Kick Moulding Matters for Your Kitchen
While it may seem like a minor detail, the toe kick is one of the most functional and practical components of your cabinetry. It is not merely a decorative trim; it is an engineered solution that addresses several key needs in a high-traffic kitchen environment.
- Ergonomic Comfort: The recess allows you to stand 3 to 4 inches closer to your countertop, reducing back strain and fatigue during meal prep. This is especially important for tasks like chopping vegetables or kneading dough.
- Cabinet Protection: It acts as a sacrificial barrier. Instead of your expensive cabinet doors or boxes getting scuffed and kicked, the durable toe kick moulding takes the abuse.
- Moisture & Dirt Defense: A properly sealed toe kick prevents spills, crumbs, and mop water from reaching the underside of your cabinets, where particle board or MDF could swell or degrade over time.
- Visual Anchoring: It visually grounds your kitchen cabinets, making them look like a permanent, built-in fixture rather than a freestanding piece of furniture.
- Concealing Leveling Legs: Most modern cabinets sit on adjustable legs. The toe kick neatly conceals these legs and the gap between the cabinet box and the floor.
Choosing the right base for your cabinets is just as important as choosing the doors. Just as you would carefully select types of cabinet doors, understanding your toe kick options ensures a professional and long-lasting result.
Standard Toe Kick Sizes & Dimensions
While there is no single universal standard, most kitchen cabinet manufacturers follow a common set of dimensions to ensure compatibility with appliances, countertops, and human ergonomics. Knowing these dimensions is crucial if you are planning a DIY installation or ordering custom cabinets.
| Dimension | Standard Measurement | Purpose & Notes |
|---|---|---|
| Height | 3.5 to 4 inches (90–100 mm) | The most common height. This provides enough clearance for most feet and allows for a comfortable stance. Some commercial or ADA-compliant designs may use a lower height. |
| Depth (Recess) | 3 to 4 inches (75–100 mm) | This is the setback from the front of the cabinet door to the face of the toe kick. It creates the necessary space for your toes when standing at the counter. |
| Thickness | 0.25 to 0.75 inches (6–19 mm) | Varies by material. Plywood or MDF is typically 0.5 to 0.75 inches. Vinyl or metal covers are much thinner, around 0.25 inches or less. |
| Length | Cut to fit (often 8 ft stock) | Toe kick material is usually sold in 8-foot lengths that are cut to the specific run of your cabinet base. It can be joined with a mitre or butt joint at corners. |
Choosing the Right Material for Your Toe Kick
The material you choose for your toe kick moulding affects its durability, appearance, and cost. It is important to select a material that can withstand moisture and frequent cleaning, especially in a busy kitchen.
| Material | Pros | Cons | Best For |
|---|---|---|---|
| MDF / Particle Board | Inexpensive, easy to paint, smooth finish. | Susceptible to water damage and swelling if not sealed properly. | Dry kitchens with a tight budget, where the toe kick will be painted to match. |
| Plywood | Durable, moisture-resistant (if marine-grade or sealed), holds screws well. | More expensive than MDF, edges may need banding. | High-humidity areas or kitchens prone to spills. A solid, long-lasting choice. |
| Solid Wood | Premium look, can be stained to match cabinets, very durable. | Most expensive, can warp with moisture changes. | High-end custom kitchens where a seamless wood finish is desired. Pair with oak stained cabinets for a cohesive look. |
| Vinyl / PVC | 100% waterproof, easy to clean, flexible, inexpensive. | Limited color options, can look less premium than wood. | Laundry rooms, bathrooms, and kitchens where moisture is a primary concern. A great match for laminate cabinets. |
| Aluminum / Stainless Steel | Extremely durable, modern look, waterproof, easy to sanitize. | Can be dented, more expensive, may not match traditional decor. | Modern, industrial, or commercial kitchens. Complements stainless farmhouse sinks. |
When choosing a material, consider the overall style of your kitchen. For a sleek, modern look, a flat PVC or metal toe kick might be perfect. For a traditional space, a wood toe kick painted or stained to match your cabinetry is a timeless choice.
Types of Toe Kick Moulding Profiles
Toe kick moulding is not a one-size-fits-all product. It comes in several profiles, each offering a different aesthetic and level of detail. The right choice can significantly impact the final look of your kitchen.
- Flat / Plain Toe Kick: The most common and minimalist option. It is a simple, flat panel that provides a clean, uninterrupted line. This is the standard choice for modern and contemporary kitchens.
- Ogee / Decorative Moulding: This profile features a classic S-curve or decorative edge. It adds a touch of traditional elegance and is often used in transitional or traditional kitchen designs. It can be used to create a more ornate base.
- Base Shoe Moulding: While technically a separate piece, base shoe is often used at the bottom of the toe kick where it meets the floor. It covers any gaps and provides a finished transition. It is a small, quarter-round moulding.
- Toe Kick with Ventilation: For kitchens with under-cabinet appliances or HVAC vents, a toe kick with a built-in grille or vent is essential. It allows for proper airflow while maintaining a clean look.
The profile you choose should complement your cabinet door style. A flat toe kick works well with modern kitchen cabinet pulls, while a decorative ogee profile pairs beautifully with more traditional hardware.
How to Install Toe Kick Moulding: A Step-by-Step Guide
Installing toe kick moulding is a manageable DIY project that can save you money and give you a professional result. The key is careful measurement and ensuring everything is level and square.
Step 1: Measure and Cut
Measure the total length of the cabinet run where the toe kick will be installed. Remember to account for corners. Cut your toe kick material to the required lengths. For outside corners, you will need to cut a 45-degree mitre. For inside corners, a butt joint is usually sufficient, but a mitre can also be used for a cleaner look.
Step 2: Prepare the Surface
Ensure the floor and the bottom of your cabinet boxes are clean and free of debris. If your cabinets have adjustable legs, make sure they are all set to the correct height and the cabinet run is perfectly level.
Step 3: Attach the Toe Kick
Apply a bead of construction adhesive to the back of the toe kick. Then, use finish nails or screws to secure it to the cabinet legs or the bottom of the cabinet box. For the cleanest look, try to nail into the legs rather than the cabinet box itself. Countersink your nails and fill the holes with wood filler.
Step 4: Finish and Seal
Once installed, caulk the top edge where the toe kick meets the cabinet and the bottom edge where it meets the floor. This prevents moisture and dirt from getting behind it. Finally, paint or stain the toe kick to match your cabinets or choose a contrasting color for a design accent.
Frequently Asked Questions About Toe Kick Moulding
While not strictly necessary for the structural integrity of the cabinet, it is highly recommended. Without it, your cabinets would be uncomfortable to stand at, and the bottom of the cabinet boxes would be vulnerable to kicks, moisture, and dirt. It is a small investment that provides significant ergonomic and protective benefits.
This is a design choice. Matching the toe kick to the cabinets creates a cohesive, built-in look. Matching it to the floor can make the cabinets appear to "float" and can be a good choice if you want to visually minimize the base of the cabinets. A third option is to paint it a contrasting color to create a deliberate design accent, which works well in 2-tone cabinets designs.
Use a damp cloth with mild soap and water. For tougher scuffs, a magic eraser works well on painted surfaces. Avoid abrasive cleaners that could scratch the finish. For a vinyl or metal toe kick, a simple all-purpose cleaner is sufficient. It is a good practice to regularly clean this area to prevent the buildup of dirt and grime.
Absolutely. This is a common and easy upgrade. You can buy new toe kick material, cut it to fit, and adhere it over the old one using construction adhesive and a few finish nails. Just ensure the new piece is slightly taller to cover any old damage or a larger gap.
Ready to Finish Your Kitchen with the Perfect Toe Kick?
Toe kick moulding is the finishing detail that combines form and function. By choosing the right material, profile, and size, you can enhance the comfort, durability, and style of your kitchen. Whether you are working with 18-inch deep base cabinets or a full custom kitchen, this small element makes a big difference.
Recommended Toe Kick Moulding & Baseboard Products
⚠️ AFFILIATE DISCLOSURE: This website contains affiliate links. As an affiliate Associate, we earn from qualifying purchases. If you make a purchase through these links, we may receive a small commission at no additional cost to you. Read our full affiliate policy.

FONUNO Vinyl Wall Base Rubber Baseboard Molding Trim Self Adhesive 4" Wide
Check price on Amazon
FONUNO Vinyl Wall Base Rubber Baseboard Molding Trim Self Adhesive 4" Wide | Vinyl Cove Base Molding Flexible Baseboard Trim for Floor Walls, Peel and Stick Design, 4 Inch x 20 Feet, Brown
Check price on Amazon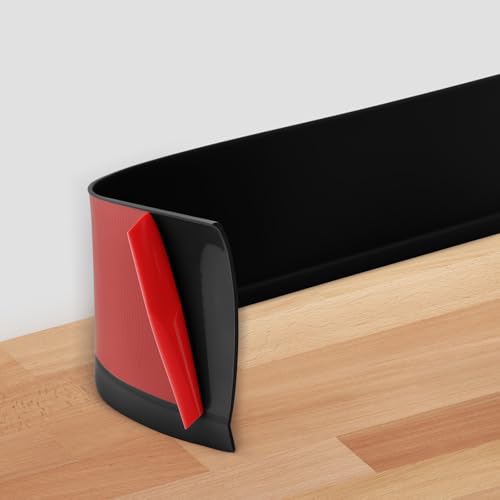
Peel and Stick Baseboard Trim 4" x 15 ft, Vinyl Baseboard Molding Black | Self-Adhesive Rubber Wall Base, Available in 4 inch x 20Ft,40Ft,50Ft,60Ft,100Ft, Flexible Cove Base for Home Office Floor
Check price on Amazon
Kneelisa Flexible Quarter Round Molding Trim Peel and Stick 118Inch White | Small Self Adhesive Silicone Shoe Moulding,Bendable Mini Waterproof Caulk Strip for Baseboard,Wall,Bathtub,Floor,Bathroom
Check price on Amazon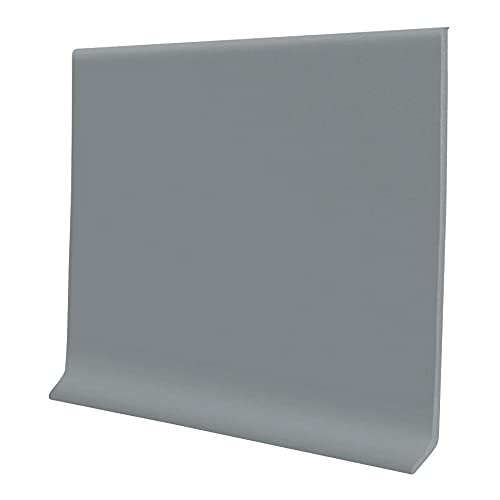
PRO Flex Gray Vinyl Wall Base 4inX20ft, Strong Peel and Stick Adhesive Baseboard Trim - Scratch Resistant, Flexible Baseboard Molding Trim with Toe Kick, Self Adhesive Molding, Easy Install & Durable
Check price on Amazon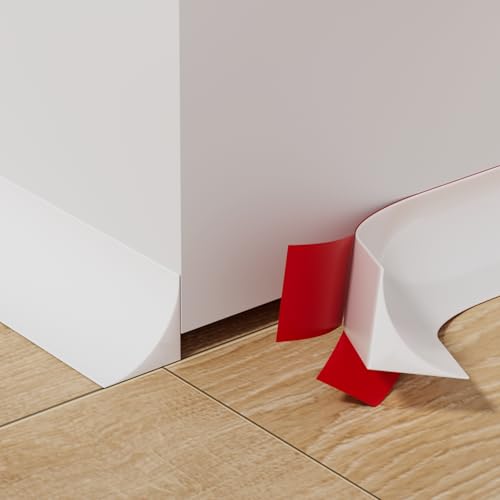
9.8' Flexible Quarter Round Molding, Peel and Stick Shoe Molding Baseboard,Selfadhesive Corner Trim for Wall Floor Edge, Bendable Rubber Trim for Stair,Countertop,Backsplash, Bathroom Bathtub (White)
Check price on Amazon
Sanbege Stainless Steel Toe Kick Cover, 4" x 102" Baseboard Plate, Self Adhesive Kickplate for Bottom of Door, Kitchen Island, Cabinet, Cupboard (Brushed Gold)
Check price on Amazon