
Cabinet Restaining Guide: A Complete DIY Transformation
Give your kitchen a stunning makeover without the cost of replacement. Learn how to restain your cabinets like a professional with our step-by-step guide.
Start Your ProjectWhy Restain? Restaining is a cost-effective way to update your kitchen's look while preserving the quality of your existing solid wood cabinets. It's a rewarding DIY project that can save you thousands compared to a full remodel.
Introduction to Cabinet Restaining
Restaining your cabinets is a fantastic way to refresh your kitchen's aesthetic, especially if you have high-quality solid wood cabinets that have become dated or worn. Unlike painting, which sits on the surface, staining penetrates the wood to enhance its natural grain and beauty. This guide will walk you through the entire process, from preparation to the final coat of protection.
Before you begin, it's important to understand your cabinet's current finish. If your cabinets are already painted or have a factory-applied thermofoil finish, restaining may not be possible without stripping them first. For those with existing stained and sealed wood, our process will work perfectly. If you're considering a total color change, you might also explore our cabinet repainting guide for an alternative approach.
Tools and Materials You Will Need
Gathering the right supplies before you start is crucial for a smooth project. Here is a comprehensive list:
- Safety Gear: Gloves, safety glasses, and a respirator mask.
- Preparation: Drop cloths, plastic sheeting, painter's tape, and a screwdriver for removing doors and hardware.
- Stripping & Sanding: Chemical stripper (if needed), sandpaper (medium and fine grit), sanding blocks, and a tack cloth.
- Staining: Wood stain in your desired color, high-quality brushes, foam brushes, and clean rags.
- Protection: Clear topcoat (polyurethane or lacquer), and a high-quality brush for applying it.
For a professional finish, consider upgrading your cabinet hardware after restaining. New pulls and knobs can dramatically enhance the updated look.
Step-by-Step Restaining Process
Step 1: Preparation and Removal
Start by emptying your cabinets and removing all doors, drawers, and hardware. Label everything so you can easily reassemble. Protect your countertops, floors, and appliances with drop cloths. Set up a well-ventilated workspace for the staining process. If your cabinets are currently finished with a clear coat, you will need to lightly sand them to create a "profile" for the new stain to adhere to.
Step 2: Cleaning and Sanding
Degrease and clean all surfaces thoroughly. Use a cabinet surface cleaning guide to ensure all grease and grime are removed. Once dry, sand all surfaces with medium-grit sandpaper, followed by fine-grit, to remove the old finish and smooth the wood. Always sand with the grain. After sanding, wipe away all dust with a tack cloth.
Step 3: Applying the Stain
This is the most critical step. Test your stain on a hidden area or a spare piece of wood first. Apply the stain using a brush or rag, working in small sections. Let it sit for a few minutes, then wipe away the excess with a clean rag to achieve your desired color depth. For a more even tone, consider using a pre-stain wood conditioner. The choice of stain can drastically change the feel of the room; for instance, a dark walnut stain can create a dramatic, modern look, while a lighter oak can enhance a rustic kitchen design.
Step 4: Applying the Topcoat
Once the stain is completely dry, apply a protective topcoat. A protective finish like polyurethane will safeguard your work from moisture, scratches, and daily wear. Apply thin, even coats, sanding lightly between coats for a smooth finish. This step is essential for the longevity of your newly restained cabinets.
Step 5: Reassembly and Final Touches
After the final coat is fully cured, reattach your doors and drawers. Install your new or cleaned hardware. This is also a great time to consider adding organizational features like pull-out shelves or cabinet organizer inserts to maximize your refreshed space.
Restaining vs. Other Cabinet Refinishing Options
Restaining is just one of several ways to update your cabinets. Understanding the alternatives can help you make the best choice for your home.
- Restaining: Best for solid wood cabinets where you want to change the color while keeping the natural grain visible. It's a multi-step process but offers a beautiful, high-end result.
- Repainting: Ideal for cabinets that are painted or for those where you want a solid, opaque color. It can cover a wider range of imperfections and is available in endless colors.
- Refinishing: This is a broader term that can include restaining, painting, or applying a new veneer. It's essentially giving the cabinet surface a new look.
- Door Swap: If your cabinet boxes are in good shape, simply replacing the doors and drawer fronts can be a cost-effective way to achieve a completely new style, like switching from a raised panel to a flat panel design.
For vintage or antique cabinets, a careful restoration might be more appropriate. You can learn more in our guide to vintage cabinet restoration.
Cost and Timeline Expectations
One of the biggest advantages of restaining is the cost savings. A full kitchen cabinet replacement can cost anywhere from $5,000 to $25,000 or more. In contrast, a DIY restaining project typically costs between $200 and $800 in materials, depending on the size of your kitchen and the quality of products you choose.
The timeline for a restaining project depends on the size of your kitchen and the drying times required. A typical project for an average-sized kitchen can take 3 to 5 days from start to finish. This includes preparation, staining, and applying multiple coats of topcoat with adequate drying time in between.
Common Mistakes to Avoid
- Skipping Surface Preparation: Not cleaning or sanding properly is the number one reason for poor adhesion and an uneven finish.
- Not Testing the Stain: Always test on a sample to ensure the color matches your expectations.
- Applying Stain Too Thickly: Thick coats can lead to a sticky, uneven mess. Apply thin, even coats and wipe off the excess.
- Rushing the Topcoat: Each coat of topcoat needs to dry completely before the next is applied. Rushing can ruin the finish.
- Ignoring Safety: Always work in a well-ventilated area and wear appropriate safety gear, especially when using chemical strippers and stains.
By avoiding these common pitfalls, you'll be well on your way to a successful and beautiful cabinet transformation.
Recommended Products for Cabinet Restaining
⚠️ AFFILIATE DISCLOSURE: This website contains affiliate links. As an affiliate Associate, we earn from qualifying purchases. If you make a purchase through these links, we may receive a small commission at no additional cost to you. Read our full affiliate policy.

Cabinet Clamps 2 Pack, Face Frame Alignment Tool with Drill Guide | Cabinet Clamps 2 Pack, Heavy Duty Face Frame Clamps with Drill Guide, EVA Pads and Carrying Case for Cabinet Installation
Check price on Amazon
Cabinet Clamps 4 Pack, Face Frame Alignment Tool with Drill Guide | Cabinet Clamps 4 Pack, Heavy Duty Face Frame Alignment Tool with Drill Guide, EVA Pads and Carrying Case for Installation
Check price on Amazon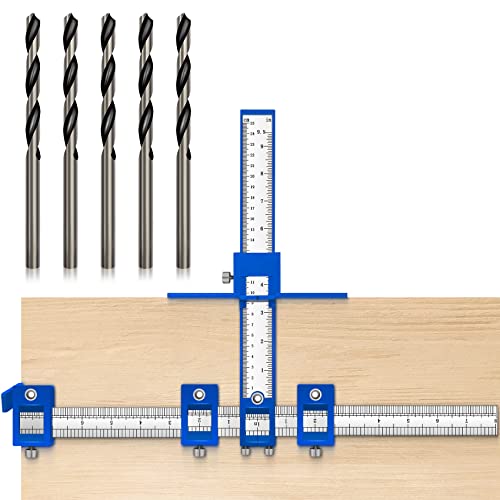
Holimax Cabinet Hardware Jig, Cabinet Handle Jig, Cabinet Hardware Template Tool, Punch Locator Drill Guide for Handle Knob Pull Installation of Door and Drawer woodworking tools
Check price on Amazon
Cabinet Hardware Jig, Punch Locator Drill Guide,Wood Drilling Dowelling Guide for Installation of Handles Knobs on Doors and Drawer, Cabinet Template Tool for Handles and Pulls
Check price on Amazon
King&Charles Cabinet Hardware Jig&Auto Center Punch&Point Drill Bits | For Handle Knob Pull on Drawer/Door, Wood Drilling Dowelling Guide Set. Cabinet Handle Jig
Check price on Amazon
Drill Mounting Template for Kitchen Cabinet Pulls Kitchen Knobs,1 Pack | Drill Bit Included, Handles Drill Template Guide, For Drawer Pulls,Cabinet Knobs, Kitchen Hardware Installation
Check price on Amazon
COTILA Cabinet Hardware Jig Template Tool for Handles Pulls and Drawers
Check price on Amazon