
Cabinet Shims Guide: How to Level Cabinets Like a Pro
Everything you need to know about cabinet shims — types, placement, materials, and step-by-step leveling techniques for a flawless cabinet installation that lasts.
Start ReadingWhat Are Cabinet Shims?
Cabinet shims are thin, wedge-shaped pieces of material inserted between a cabinet and the wall, floor, or adjoining cabinet to correct uneven surfaces. They are the unsung heroes of professional cabinet installation — small, inexpensive, and absolutely essential for achieving a level, plumb, and square result.
Whether you are installing modern kitchen cabinets, bathroom vanity cabinets, or garage storage cabinets, shims compensate for the natural imperfections found in virtually every home. Floors slope, walls bow, and corners are rarely perfectly square. Shims bridge those gaps, ensuring your cabinets sit flush and function correctly for years to come.
Without proper shimming, cabinet doors may rub against each other, drawers can slide open on their own, and the entire installation can look crooked. For a comprehensive overview of the installation process, see our cabinet installation guide.
Why Cabinet Leveling Matters
Leveling is not just about aesthetics — it is about functionality, durability, and safety. Here is why taking the time to shim your cabinets correctly pays off:
- Door and drawer alignment: Even a slight tilt can cause doors to swing open or rub against adjacent cabinets. Proper shimming keeps everything aligned.
- Structural integrity: Cabinets that are not level place uneven stress on hinges and drawer slides, leading to premature wear. See our cabinet hinges guide and cabinet drawer slides guide for maintenance tips.
- Countertop installation: Countertops require a perfectly level base. If your cabinets are not level, your countertop may crack or fit poorly.
- Visual appeal: Crooked cabinets are immediately noticeable and can make an entire kitchen or bathroom feel unfinished.
- Safety: Unstable cabinets can tip, especially if they are not secured properly. Combine shimming with cabinet anti-tip straps for maximum safety.
Pro Tip: Always check for level in both directions — side-to-side and front-to-back. A cabinet can be level left-to-right but tilted forward, causing doors to swing open.
Types of Cabinet Shims
Not all shims are created equal. The type you choose depends on the application, the load-bearing requirements, and the environment. Here are the most common types used in cabinet installation:
1. Wooden Shims
Traditional wooden shims are made from cedar, pine, or hardwood. They are strong, affordable, and can be trimmed or snapped to size. Wooden shims are ideal for heavy cabinets and load-bearing applications. However, they can compress over time and are susceptible to moisture damage in humid environments like bathrooms or laundry rooms.
2. Composite Shims
Composite shims are made from plastic or engineered materials. They are moisture-resistant, do not compress, and are less likely to split than wood. Composite shims are an excellent choice for bathroom vanities and laundry room cabinets where humidity is a concern.
3. Plastic Shims
Plastic shims are durable, lightweight, and impervious to water. They are often sold in pre-cut sizes and are easy to stack. Plastic shims are a great option for quick installations, but they can be slippery and may not hold as well as wood or composite under heavy loads.
4. Cardboard or Homemade Shims
While not recommended for permanent installations, cardboard or folded paper shims can be used as temporary spacers during dry fitting. For a permanent solution, always upgrade to wood, composite, or plastic shims.
5. Adjustable Legs and Leveling Feet
Some modern cabinets, particularly European-style frameless cabinets, come with adjustable legs or leveling feet. These built-in mechanisms can replace traditional shims entirely. If your cabinets have adjustable legs, you may only need shims for fine-tuning. Learn more about stock vs custom cabinets to understand which types include this feature.
Material Comparison: Which Shim Is Right for You?
Use the table below to compare the most common shim materials based on strength, moisture resistance, and best use case.
| Material | Strength | Moisture Resistance | Best For | Typical Cost |
|---|---|---|---|---|
| Wooden (Cedar/Pine) | High | Low | Heavy base cabinets, dry areas | $5–$10 per pack |
| Composite | High | High | Bathrooms, laundry rooms, kitchens | $8–$15 per pack |
| Plastic | Medium | High | Light cabinets, quick fixes | $4–$8 per pack |
| Hardwood | Very High | Medium | Heavy load-bearing applications | $10–$20 per pack |
For most residential cabinet installations, composite shims offer the best balance of strength, durability, and moisture resistance. They are particularly recommended for kitchen cabinets and bathroom installations.
Where to Place Cabinet Shims
Correct shim placement is critical. Placing shims in the wrong spot can cause cabinets to twist or bow. Follow these guidelines for optimal results:
Base Cabinets
- Under the cabinet base: Place shims under the corners and along the front and back edges of the cabinet floor. This is the primary shimming location for base cabinets.
- At the toe kick: If the cabinet has a toe kick, shim behind it to maintain a consistent reveal.
- Between cabinets: When joining cabinets together, use shims to align the faces and ensure a flush fit.
Wall Cabinets
- Behind the cabinet: Place shims between the cabinet back and the wall to correct for bowed or uneven walls.
- At the mounting rail: Shim behind the mounting rail where the cabinet attaches to the wall studs.
- Between adjacent cabinets: Use shims to align the faces of side-by-side wall cabinets.
Bathroom Vanities
- Under the vanity base: Similar to base cabinets, shim under the corners and edges.
- Around plumbing: Use shims to level the vanity while accommodating plumbing rough-ins.
For more detailed placement guidance, see our cabinet placement guide and cabinet leveling guide.
Step-by-Step: How to Level Cabinets with Shims
Follow these steps for a professional-level cabinet installation. This process applies to base cabinets, wall cabinets, and bathroom vanities.
Prepare the Space
Clear the installation area and ensure the floor and walls are clean. Locate wall studs using a stud finder and mark them. If you are installing plywood cabinet boxes or particle board cabinets, check the manufacturer's instructions for specific requirements.
Position the Cabinet
Place the cabinet in its intended position. Do not fasten it yet. Use a 4-foot level to check for level side-to-side and front-to-back. Mark any low spots with a pencil.
Insert Shims at Low Points
Slide shims under the low corners or edges. Start with thicker shims and fine-tune with thinner ones. Stack shims from opposite directions to create a stable, flat surface. Avoid stacking more than three shims in one spot.
Check and Adjust
Re-check level in all directions. Adjust shims as needed until the cabinet is perfectly level and plumb. Check that the cabinet face is flush with adjacent cabinets.
Secure the Cabinet
Once level, fasten the cabinet to the wall studs using appropriate screws. See our cabinet screw types guide for recommendations. For wall cabinets, use cabinet wall anchors if studs are not available.
Trim Excess Shim Material
Use a utility knife or oscillating tool to trim excess shim material flush with the cabinet base. Be careful not to damage the cabinet or flooring.
Install Toe Kick and Trim
Install the toe kick and any trim pieces to conceal the shims and create a finished look. For L-shaped or U-shaped kitchen cabinets, ensure corner cabinets are shimmed consistently.
Final Inspection
Open and close all doors and drawers to ensure smooth operation. Check that doors align properly. If adjustments are needed, see our cabinet door alignment guide.
Pro Tip: For heavy cabinets or those holding appliances, use composite or hardwood shims. Avoid plastic shims for load-bearing applications, as they can deform under pressure.
Common Cabinet Shimming Mistakes to Avoid
Even experienced DIYers make these mistakes. Avoid them for a flawless installation:
- Over-shimming: Stacking too many shims creates an unstable base. Use fewer, thicker shims instead.
- Shimming only one side: Always check both sides and the front and back of the cabinet. A cabinet can be level left-to-right but tilted forward.
- Using the wrong material: Wood shims in a bathroom will swell and rot. Use composite or plastic in moisture-prone areas.
- Not securing shims: Loose shims can shift over time. Glue or staple shims in place before securing the cabinet.
- Ignoring the floor: If the floor is severely uneven, consider using a self-leveling compound before installing cabinets.
- Forgetting about appliance clearance: Ensure shimming does not interfere with cabinet appliance clearance.
- Skipping the level check after fastening: Fastening can shift the cabinet. Always re-check level after securing.
For more pitfalls to avoid, read our cabinet buying mistakes guide.
Tools You'll Need for Cabinet Shimming
Gather these tools before you begin. Having everything on hand makes the job faster and easier:
- 4-foot level: Essential for checking level across the entire cabinet run.
- Torpedo level: Useful for tight spaces and checking plumb.
- Tape measure: For accurate placement and alignment.
- Utility knife or oscillating tool: For trimming excess shim material.
- Wood glue or construction adhesive: To secure shims in place.
- Staple gun: For fastening shims to the cabinet base.
- Drill and driver bits: For securing cabinets to studs.
- Stud finder: To locate wall studs accurately.
- Pencil: For marking low spots and reference lines.
- Safety glasses and gloves: Always prioritize safety.
For a complete list of installation tools, see our installation and accessories hub.
Frequently Asked Questions About Cabinet Shims
How many shims do I need per cabinet?
The number depends on how uneven your floor or wall is. As a rule of thumb, use at least one shim at each corner of a base cabinet. For wall cabinets, shim at each mounting point. It is better to have extra shims on hand than to run out mid-installation.
Can I use coins or cardboard as shims?
While coins or cardboard can work as temporary spacers during dry fitting, they are not recommended for permanent installations. They can compress, shift, or deteriorate over time. Always use purpose-made shims for a lasting result.
What is the best shim material for kitchen cabinets?
Composite shims are generally the best choice for kitchen cabinets. They are strong, moisture-resistant, and do not compress. For heavy base cabinets, hardwood shims are also an excellent option.
Do I need to shim wall cabinets?
Yes, if the wall is uneven. Wall cabinets should be shimmed behind the cabinet back where it meets the wall. This ensures the cabinet face is plumb and aligns with adjacent cabinets.
How do I shim a cabinet on an uneven floor?
Place shims under the low corners of the cabinet base. Stack shims from opposite directions for stability. Check level frequently and adjust as needed. For severely uneven floors, consider using a self-leveling compound first.
Can I shim a cabinet after it is installed?
It is much easier to shim before securing the cabinet. However, if you need to adjust after installation, you can loosen the mounting screws, insert shims, and re-secure. Always re-check level after adjustments.
What if my cabinet has adjustable legs?
If your cabinet has adjustable legs, use them for primary leveling. Use shims only for fine-tuning or if the adjustable range is insufficient. Many European-style cabinets come with adjustable legs, which can simplify the process.
Ready to Install Your Cabinets?
Now that you understand cabinet shims, explore our other installation guides and find the perfect cabinets for your project.
View Installation GuideRecommended Cabinet Shims & Leveling Tools
⚠️ AFFILIATE DISCLOSURE: This website contains affiliate links. As an affiliate Associate, we earn from qualifying purchases. If you make a purchase through these links, we may receive a small commission at no additional cost to you. Read our full affiliate policy.

Kreg Setup & Spacer Shims, KCS-SHIMS, For Cabinet Drawers and Doors
Check price on Amazon
Pangda 50 Pack 1/16" Cabinet Hinge Shims Clear, U-shaped Hinge Spacers | 1.5 mm Overlay Reducer Shims, 1.18" x 0.71", Plastic Pads for Compatible Concealed Hinges, Furniture Repair
Check price on Amazon
Shaker Drawer Front Kit - Adapter Kit for Cabinet Hardware Jig Eliminates the Need to Use a Shim on Recessed Panels - True Position Tools - TP-SDFK
Check price on Amazon
4Pcs Cabinet Door Hinge Install Adjustment Tool, 2mm Gap Alignment Spacer | Magnetic Hinge Jig Shims, for Adjusting Gaps in Home Cabinet Doors and Quick Installation of Hinges on Wooden Cabinet Doors
Check price on Amazon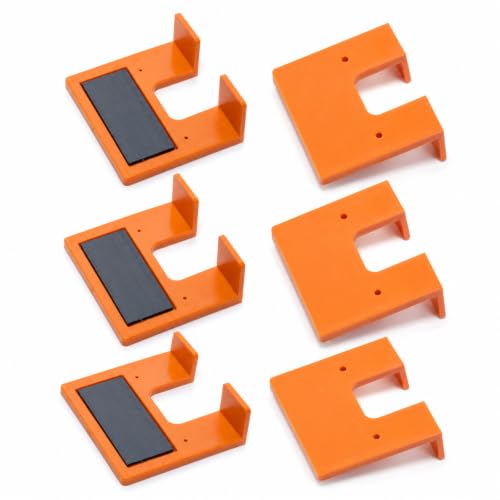
6PCS Cabinet Hinge Jig, Magnetic 2mm Gap Spacer Alignment Tool
Check price on Amazon
2Pcs Cabinet Door Hinge Install Adjustment Tool, 2mm Gap Alignment Spacer | Magnetic Hinge jig shims, for adjusting gaps in home cabinet doors and quick installation of hinges on wooden cabinet doors
Check price on Amazon
Wobble Wedge Plastic Shims for Leveling, Furniture Wedges, Clear, 30 Pack | Flexible Plastic Shims, Non Slip, Stackable and Trimmable, Level Tables, Chairs, Cabinets, Appliances and Toilets, USA Made
Check price on Amazon