Cabinet Surface Refinishing: Restore Your Cabinets Like a Pro
Transform worn, faded, or outdated cabinet surfaces into a fresh, durable finish — without the cost of full cabinet replacement.
START REFINISHINGWhy refinishing matters: Cabinet refinishing is one of the most cost-effective ways to breathe new life into a kitchen, bathroom, or laundry room. Instead of replacing solid cabinet boxes that are still structurally sound, you restore only the visible surface layer. The result is a refreshed look at a fraction of the price — and often in a single weekend.
What Is Cabinet Surface Refinishing?
Cabinet surface refinishing is the process of renewing the exterior finish of your cabinet doors, drawer fronts, and visible box surfaces. Unlike a full replacement, refinishing keeps the existing cabinet structure intact and focuses on restoring the top layer — the part you actually see and touch every day. This makes it an ideal solution for cabinets that are sturdy but look tired, scratched, or dated.
The term "refinishing" covers a range of techniques, including sanding and re-staining, painting, and applying a new protective topcoat. It is closely related to cabinet repainting and cabinet restaining, but refinishing is the broader umbrella term that includes surface preparation, color change, and protective sealing. If your cabinet boxes are in good shape and you simply want a different look, refinishing is almost always the smarter financial move.
Signs Your Cabinets Need Refinishing
Not every cabinet problem calls for refinishing, but several common symptoms are clear indicators that a surface refresh will pay off. Watch for these warning signs:
- Faded or discolored finish — especially on cabinets exposed to direct sunlight, where UV damage dulls the original color.
- Surface scratches and scuffs — everyday wear from opening doors, pulling drawers, and cleaning.
- Peeling, cracking, or flaking — a sign the existing topcoat has failed and moisture is reaching the substrate.
- Grease and grime buildup — common near stovetops, where cooking residue bonds to the finish.
- Outdated color or style — a cosmetic concern, but one that dramatically affects how modern your kitchen feels.
- Minor water damage — light swelling or staining around sinks and dishwashers that has not yet reached the cabinet core.
If your cabinets suffer from deeper structural issues such as warping, delamination, or soft, crumbling wood, refinishing alone may not be enough. In those cases, review the cabinet flood damage restoration guide to assess whether repair or replacement is the better path. For surface-level concerns, refinishing is usually the right call.
Paint vs Stain vs Topcoat: Which Refinishing Method Fits?
Before you pick up a brush, decide which refinishing method matches your cabinet material, desired look, and skill level. Each option has distinct advantages, costs, and durability profiles.
| Method | Best For | Durability | Typical Cost | Skill Level |
|---|---|---|---|---|
| Painting | Solid wood, MDF, thermofoil; bold color changes | High (5–10 years) | $200–$600 DIY | Beginner-friendly |
| Staining | Real wood with visible grain; natural tone refresh | Very High (10+ years) | $150–$500 DIY | Intermediate |
| Topcoat only | Sound existing finish that just looks dull | Moderate (3–5 years) | $80–$250 DIY | Beginner-friendly |
Painting is the most popular choice because it works on nearly any surface and hides imperfections well. However, it requires thorough prep and a bonding primer for the best adhesion. Staining preserves the natural beauty of wood grain and is the go-to method for oak kitchen cabinets, maple kitchen cabinets, and cherry kitchen cabinets. A topcoat-only refresh is the least invasive option and works well when the underlying finish is still intact but has lost its sheen.
Pro tip: If your cabinet doors are damaged beyond surface repair, consider a cabinet door swap instead. New doors combined with a refinished box can deliver a factory-fresh look for far less than a full cabinet replacement.
Materials and Tools You Will Need
A successful refinishing project depends on having the right supplies on hand before you start. Gathering everything upfront prevents mid-project delays and helps you achieve a consistent, professional-looking finish.
Essential Tools
- Random orbital sander — for efficient surface preparation on flat areas.
- Sanding blocks and detail sanders — for edges, profiles, and recessed panels.
- High-quality brushes and foam rollers — foam rollers minimize brush marks on flat surfaces.
- Painter's tape and plastic sheeting — to protect walls, countertops, and appliances.
- Dust masks and safety glasses — sanding and chemical strippers require proper protection.
- Tack cloths — to remove fine dust before applying primer or finish.
Materials
- Bonding primer — essential for slick surfaces like thermofoil and previously painted cabinets.
- Cabinet-grade paint or stain — choose a product specifically formulated for cabinetry.
- Protective topcoat — polyurethane, lacquer, or a water-based clear coat for durability.
- Wood filler — to repair minor dents, scratches, and screw holes before finishing.
- Degreaser and cleaning solution — kitchen cabinets collect grease that must be removed before sanding.
If you are refinishing cabinets in a bathroom or laundry room, pay extra attention to moisture resistance. The bathroom vanity cabinets and laundry room cabinets guides cover material choices that hold up well in humid environments. For kitchen projects, the kitchen cabinets guide provides a broader overview of cabinet construction that helps you decide how much surface you can safely refinish.
Step-by-Step Cabinet Surface Refinishing
Follow these steps in order for the most reliable, long-lasting result. Rushing the preparation stage is the single most common reason DIY refinishing fails.
Remove Doors, Drawers & Hardware
Label every door and drawer so you can reinstall them in the exact same position. Remove hinges, knobs, and pulls. This is also the ideal time to upgrade hardware — see the cabinet hardware guide for options.
Clean and Degrease
Kitchen cabinets carry a film of cooking grease that prevents adhesion. Use a degreaser and scrub every surface, including edges and recesses. Rinse and let dry completely.
Repair and Sand
Fill dents and cracks with wood filler, then sand the entire surface to create a "tooth" for the new finish. For detailed surface repair tips, see cabinet scratch touch-up.
Apply Primer
Use a bonding primer on all surfaces, especially if you are painting over a dark color or a slick material. Primer blocks stains and ensures even topcoat coverage.
Apply Finish Coats
Brush or roll thin, even coats of paint or stain. Multiple thin coats outperform one thick coat. Lightly sand between coats for a smooth finish.
Seal and Reassemble
Apply a protective topcoat, let it cure fully, then reattach hardware and doors. Check alignment using the cabinet door alignment guide.
Important: Always let the final topcoat cure for the full manufacturer-recommended time before reinstalling doors and drawers. Handling a finish that is still curing can leave permanent fingerprints and scratches.
Why Surface Preparation Determines Success
Ask any professional refinisher and they will tell you the same thing: preparation is 80 percent of the job. A flawless topcoat applied over a poorly prepared surface will still peel, flake, or look uneven. Proper prep solves three problems at once — it removes contaminants, creates a mechanical bond, and smooths imperfections that would otherwise show through the finish.
Start by cleaning thoroughly. Kitchen cabinets accumulate grease even if they look clean, and that invisible film is the enemy of adhesion. Follow with sanding using a medium-grit paper to scuff the surface, then progress to a finer grit for smoothness. Always wipe away dust with a tack cloth before priming. If your cabinets have sticky residue from old labels or adhesives, the sticky residue removal guide explains safe removal methods that will not damage the substrate.
Do not skip the primer stage, especially on thermofoil cabinet doors, which have a non-porous surface that resists paint. A bonding primer is the bridge that makes paint stick. For solid wood surfaces, primer also blocks tannins and knots that could bleed through and discolor your new finish.
Cabinet Refinishing Cost: DIY vs Professional
Budget is often the deciding factor between refinishing and replacing. Refinishing is dramatically cheaper, but the gap between DIY and professional service is also worth understanding.
- DIY refinishing: $150–$600 for a typical kitchen, covering primer, paint or stain, topcoat, sandpaper, and disposable supplies.
- Professional refinishing: $1,200–$3,500 for a standard kitchen, depending on cabinet count, finish type, and regional labor rates.
- Full cabinet replacement: $4,000–$15,000+ for stock or semi-custom cabinets, plus installation.
The savings from refinishing are substantial, and the results can be nearly indistinguishable from new cabinets when the work is done carefully. If you are weighing refinishing against a broader kitchen update, the cabinet shopping and reviews hub offers comparisons that help you decide whether to invest in new cabinetry or refresh what you already own.
Budget tip: Refinishing is an excellent way to stretch a renovation budget. Money saved on cabinet replacement can be redirected toward upgraded cabinet pulls and knobs, new drawer slides, or improved under-cabinet lighting.
Common Refinishing Mistakes to Avoid
Most refinishing failures trace back to a handful of avoidable errors. Steering clear of these will put your project ahead of the average DIY attempt.
- Skipping degreasing. Grease residue causes paint to peel within months.
- Not sanding enough. A glossy surface needs to be scuffed for the finish to grip.
- Applying thick coats. Thick coats dry unevenly, drip, and remain soft underneath.
- Using the wrong paint. Wall paint is not formulated for the wear cabinets endure. Choose cabinet-specific products.
- Refinishing in a humid or cold environment. Temperature and humidity affect curing and can cause a cloudy finish.
- Reinstalling doors too soon. Handling a semi-cured finish is a recipe for permanent marks.
One more often-overlooked mistake is ignoring the environment. High humidity slows curing and can trap moisture in the finish. If you live in a humid climate or are refinishing in a basement, review the cabinet humidity control guide before you begin. If your cabinets are exposed to strong sunlight, factor in fade resistance by reading about cabinet sun fade protection.
Caring for Your Newly Refinished Cabinets
Once the finish has fully cured, a little maintenance keeps it looking fresh for years. Clean with a soft cloth and mild soap rather than abrasive cleaners, which can dull the topcoat. Wipe up spills promptly, especially around sinks and stovetops, to prevent moisture from working under the finish.
For routine care, follow the recommendations in the cabinet surface cleaning guide. Avoid excessive water, which can swell wood and loosen the finish at seams. If you notice a small scratch or chip, address it early using the techniques in cabinet scratch touch-up before it grows into a larger repair. To extend the life of the finish, consider periodic application of a quality polish as described in cabinet wood polishing.
For a complete care routine that covers cleaning, damage prevention, and long-term protection, bookmark the cabinet care and maintenance hub. It is the central resource for keeping any cabinet finish — whether factory-original or freshly refinished — in top condition.
Frequently Asked Questions
A properly prepared and finished cabinet surface typically lasts 5 to 10 years for painted finishes and 10 or more years for stained and topcoated wood. Longevity depends heavily on surface preparation, the quality of products used, and how well the cabinets are maintained.
There are liquid deglossers and bonding primers designed to reduce sanding, but some mechanical abrasion is still recommended for best adhesion. For a durable, professional result, light sanding remains the safest approach, especially on previously painted or glossy surfaces.
Paint is better for hiding imperfections, changing color dramatically, and covering mixed materials. Stain is better for preserving natural wood grain and achieving a rich, furniture-like look. If your cabinets are solid wood with attractive grain — such as oak, maple, or cherry — staining often delivers a more premium result.
DIY refinishing typically costs $150 to $600 for materials. Professional refinishing generally runs $1,200 to $3,500 depending on kitchen size, finish complexity, and location. Both options are significantly cheaper than replacing cabinets, which can cost $4,000 or more.
Yes. Painted cabinets can be refinished again, but preparation is critical. You must clean, sand, and use a bonding primer compatible with the existing paint. If the current paint is peeling or chalking, remove loose material first and repair the surface before applying a new finish.
Ready to Refresh Your Cabinets?
Refinishing is the smart, budget-friendly way to transform your kitchen or bathroom without the expense of new cabinetry. Gather your supplies, follow the steps, and enjoy a finish that looks professionally done.
EXPLORE CARE & MAINTENANCERecommended Refinishing Supplies & Cabinets
⚠️ AFFILIATE DISCLOSURE: This website contains affiliate links. As an affiliate Associate, we earn from qualifying purchases. If you make a purchase through these links, we may receive a small commission at no additional cost to you. Read our full affiliate policy.

Beyond Paint All-in-One Refinishing Paint, No Sanding, Matte Finish for Cabinets, Countertops, Furniture and Doors, 1 Pint, Bright White
Check price on Amazon
Beyond Paint Furniture, Cabinets and More All-in-one Refinishing Paint Gallon, No Stripping, Sanding or Priming Needed, Bright White, 3.79 Litre (BP24)
Check price on Amazon
BEYOND PAINT - Furniture, Cabinets and More All-in-One Refinishing Paint -Quart of Bright White
Check price on Amazon
Beyond Paint Furniture, Cabinets and More All-in-One Refinishing Paint Gallon-Color: Mocha - No Stripping No Sanding No Priming
Check price on Amazon
Krud Kutter Gloss-Off Prepaint Surface Preparation Cleaner, 32 oz, No Sanding Liquid Deglosser for Cabinets, Trim, Doors and Furniture, Removes Dirt Grease and Gloss for Paint Adhesion
Check price on Amazon
Beyond Paint All-in-One Refinishing Paint, No Sanding, Matte Finish for Cabinets, Countertops, Furniture and Doors, 1 Gallon, Sand
Check price on Amazon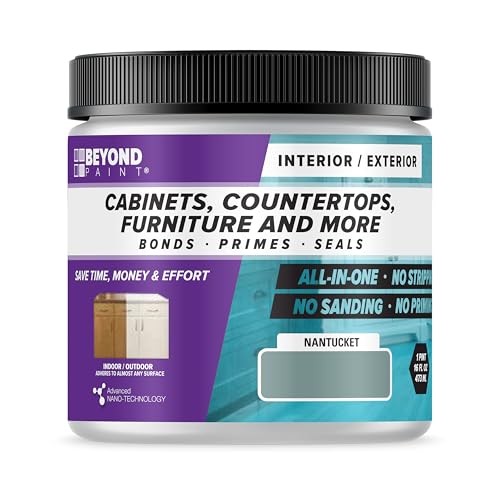
Beyond Paint All-in-One Refinishing Paint, No Sanding, Matte Finish for Cabinets, Countertops, Furniture and Doors, 1 Pint, Nantucket
Check price on Amazon