
Cabinet Repainting Guide: A Complete Step-by-Step Tutorial
Transform your kitchen with a professional-looking paint job. Learn how to prep, prime, and paint your cabinets for a durable, factory-quality finish that lasts.
Start the TutorialWhy Repaint Your Cabinets? Repainting is one of the most cost-effective ways to update your kitchen. Instead of spending thousands on new cabinets, a high-quality repaint can give your existing cabinet types a fresh, modern look for a fraction of the cost. This guide will walk you through the entire process, from choosing the right paint to achieving a smooth, durable finish that withstands daily use.
The 7-Step Cabinet Repainting Process
Follow these steps carefully to ensure a professional result. Rushing the preparation is the most common reason for paint failure.
Preparation & Protection
Proper prep is 80% of the work. Start by removing all doors, drawers, and hardware. Label each piece so you can reassemble them correctly.
- Clear countertops and remove all items from cabinets.
- Cover floors, countertops, and appliances with drop cloths and plastic sheeting.
- Remove doors, drawers, hinges, knobs, and pulls. Store screws in labeled bags.
- Clean all surfaces thoroughly with a degreaser to remove grease, grime, and cooking residue. This is critical for paint adhesion.
Repair & Sand
Fix any damage and create a surface profile for the paint to grip. For a flawless finish, you need a smooth base.
- Fill any dents, cracks, or holes with wood filler. Let dry, then sand smooth.
- Lightly sand all surfaces with 120-150 grit sandpaper. For a factory-smooth look, consider using a liquid deglosser.
- Use a vacuum and a tack cloth to remove all dust. Any dust left behind will show through the paint.
- If your cabinets are thermofoil or have a glossy finish, sanding is especially important for adhesion.
Priming
A high-quality primer is essential for blocking stains, ensuring adhesion, and providing a uniform base for your topcoat.
- Choose a bonding primer specifically designed for kitchen cabinets, such as a shellac-based or oil-based primer.
- Apply primer using a high-density foam roller for flat surfaces and a brush for edges and details.
- Allow the primer to dry completely according to the manufacturer's instructions before sanding lightly with 220-grit paper.
Choose Your Paint
Not all paints are created equal. For cabinets, you need a durable, hard-wearing paint that can withstand frequent cleaning.
- Best Options: Waterborne alkyd, 100% acrylic, or urethane-enriched paints. These offer a hard, factory-like finish.
- Finish: A satin or semi-gloss finish is ideal. It's durable, easy to clean, and reflects light nicely.
- Sheen: Avoid flat or matte finishes; they absorb stains and are hard to clean.
- Explore our cabinet material hub for more insights on finishes and durability.
Application Technique
This is where the magic happens. Use the right tools and technique to avoid brush marks and achieve a smooth finish.
- Use a high-quality 4-inch foam roller for large flat areas like door panels.
- Use a high-quality synthetic brush for edges, corners, and recessed areas.
- Apply thin, even coats. Two thin coats are always better than one thick coat.
- Paint in the direction of the wood grain. For flat panels, roll on and then "tip off" with a brush to smooth out bubbles.
- Allow each coat to dry completely before applying the next. Lightly sand between coats with 320-grit paper for a glass-smooth finish.
Curing & Reassembly
Patience is key. Paint needs time to cure, not just dry. This is when it becomes hard and durable.
- Let the painted doors and drawers dry in a dust-free area for at least 24-48 hours before handling.
- Wait at least 5-7 days before reattaching hardware and reassembling doors. This allows the paint to fully cure.
- Be gentle with your cabinets for the first week. Avoid harsh cleaning chemicals.
- For more tips on protecting your new finish, see our cabinet paint protection guide.
Upgrade Hardware
While your cabinets are apart, it's the perfect time to upgrade your hardware. New knobs and pulls can dramatically change the look.
- Consider new cabinet pulls and knobs in modern finishes like matte black, brushed brass, or nickel.
- If your hinges are old, upgrading to soft-close hinges is a great investment.
- Ensure any new hardware aligns with your existing holes, or be prepared to fill and drill new ones.
Cost & Time Estimate
Repainting is significantly cheaper than replacing cabinets. Here is a realistic breakdown of what you can expect for a standard kitchen with 20 cabinet doors.
| Item | Estimated Cost | Notes |
|---|---|---|
| Primer (2 gallons) | $60 – $100 | High-quality bonding primer |
| Paint (2 gallons) | $120 – $200 | Waterborne alkyd or acrylic |
| Sandpaper & Tack Cloth | $20 – $40 | Various grits (120, 220, 320) |
| Brushes & Rollers | $30 – $50 | High-quality foam rollers and synthetic brushes |
| Drop Cloths & Tape | $15 – $30 | Painter's tape and plastic sheeting |
| New Hardware (optional) | $50 – $150 | Knobs and pulls for 20 doors |
| Total DIY Cost | $295 – $570 | Significantly less than new cabinets |
Time Estimate: A typical DIY repaint takes about 2-4 days of active work, plus 5-7 days of curing time. This can be spread over a week or two.
Frequently Asked Questions
Can I paint over stained or varnished cabinets?
Yes, but preparation is key. You must degrease, sand, and use a high-quality bonding primer to ensure the paint adheres. For heavily stained wood, a shellac-based primer is best to block tannin bleed-through.
Do I need to remove the cabinet doors?
Yes, it is highly recommended. Painting doors while they are flat on a workbench allows for a much smoother, more even finish without drips or brush marks. It also makes it easier to paint all edges.
How long before I can use my cabinets?
You can carefully reassemble them after 48 hours, but the paint needs about 7 days to fully cure. Avoid heavy use or cleaning during this period. For more details, refer to our cabinet repainting guide.
What is the best paint finish for kitchen cabinets?
Satin or semi-gloss are the best choices. They are durable, easy to clean, and resist moisture and stains. Flat or matte finishes are not recommended for kitchens as they are difficult to clean.
Can I use a paint sprayer instead of a brush and roller?
Yes, an HVLP (High Volume Low Pressure) paint sprayer can provide a very smooth, factory-like finish. However, it requires more prep work to mask off the surrounding area and has a learning curve. For beginners, a high-quality brush and roller is more forgiving.
How do I prevent brush marks?
Use high-quality synthetic brushes, apply thin coats, and "tip off" the paint by lightly dragging the brush over the wet surface in one direction. Lightly sanding between coats with 320-grit paper also helps achieve a smooth finish.
Recommended Products for Cabinet Repainting
⚠️ AFFILIATE DISCLOSURE: This website contains affiliate links. As an affiliate Associate, we earn from qualifying purchases. If you make a purchase through these links, we may receive a small commission at no additional cost to you. Read our full affiliate policy.

Cabinet Hardware Jig, Punch Locator Drill Guide,Wood Drilling Dowelling Guide for Installation of Handles Knobs on Doors and Drawer, Cabinet Template Tool for Handles and Pulls
Check price on Amazon
WORKPRO Cabinet Hardware Jig, Adjustable Cabinet Handle Template
Check price on Amazon
COTILA Cabinet Hardware Jig Template Tool for Handles Pulls and Drawers
Check price on Amazon
vicrays Cabinet Hardware Handle Jig - Aluminum Alloy Cabinet Template Tool Woodworking Drilling Hole Doweling Guide Punch Locator for Installation Handles Knob on Drawer Door Pulls(Black)
Check price on Amazon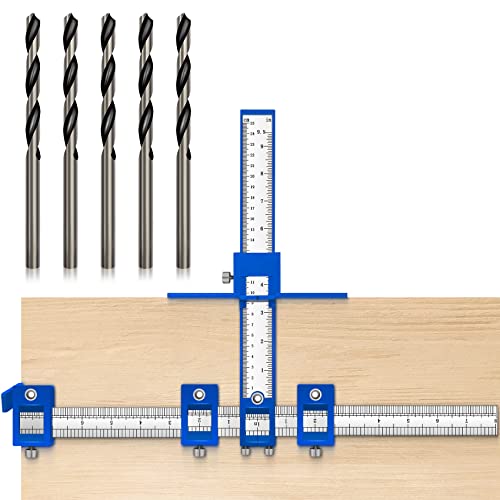
Holimax Cabinet Hardware Jig, Cabinet Handle Jig, Cabinet Hardware Template Tool, Punch Locator Drill Guide for Handle Knob Pull Installation of Door and Drawer woodworking tools
Check price on Amazon
Cabinet Installation Tool Kit – Self Centering Drill Bit Set and Cabinet Clamps, Woodworking Hinge Drill Guide for Doors, Drawers & Hardware Alignment
Check price on Amazon
TOURACE Cabinet Hardware Jig for Handles and Knobs Aluminum Alloy Drill Guide Sleeve Drawer Pull Wood Drilling Dowelling Tools Set Drawer Knob Pull Drilling Templates Jig Tool
Check price on AmazonReady to Transform Your Kitchen?
Now that you have the knowledge, it's time to gather your supplies and get started. A fresh coat of paint is the easiest way to fall in love with your kitchen again.
Explore More Cabinet Guides