
Cabinet Installation Guide: How to Install Cabinets Like a Pro
Everything you need to know about installing kitchen cabinets, from wall mounting to base cabinet leveling. Save thousands on professional installation with our step-by-step instructions.
📋 What You'll Learn in This Guide
Installing cabinets is one of the most rewarding DIY projects you can tackle. Whether you're upgrading your kitchen with modern kitchen cabinets or adding storage to your laundry room, proper installation ensures your cabinets look great and function safely for years. Professional installation can cost $50 to $100 per cabinet, but with the right tools and patience, you can achieve professional results yourself.
This guide covers everything from measuring your space to the final adjustments. Before you begin, make sure you've chosen the right cabinets for your layout — our kitchen cabinets guide can help you decide between stock, semi-custom, and custom options. If you're still in the planning phase, our cabinet placement guide will help you map out your layout for maximum efficiency.
1. Preparation & Essential Tools
Before you start, gather all necessary tools and materials. Having everything within reach will make the installation smoother and safer. The right tools also prevent damage to your cabinets and walls.
🛠️ Essential Tools Checklist
Measuring & Marking: Tape measure, pencil, chalk line, spirit level (4-foot and 2-foot), stud finder, framing square.
Cutting & Drilling: Cordless drill, impact driver, hole saw kit, circular saw, jigsaw, oscillating multi-tool.
Fastening & Support: Cabinet screws (2.5" and 3"), wall anchors, shims, cabinet jack or T-brace, clamps.
Safety: Safety glasses, work gloves, dust mask, ear protection.
Always verify the structural integrity of your walls before installation. Use a stud finder to locate wall studs, which are typically spaced 16 inches apart. For heavy wall cabinets, you must screw directly into studs or use appropriate cabinet wall anchors if studs aren't available in the right positions. If you're installing cabinets on uneven walls, you'll need cabinet shims to fill gaps and create a level surface.
Check that you have the correct cabinet screws for your installation. Most cabinet installations use #8 or #10 screws that are 2.5 to 3 inches long for attaching cabinets to studs, and 1.25-inch screws for joining cabinets together.
2. Layout & Marking Your Walls
Accurate layout is the foundation of a successful installation. Start by finding the highest point of your floor — this is where your base cabinets will sit. Use a level to draw a horizontal line around the room at this height. This line represents the top of your base cabinet boxes.
Establishing Key Reference Lines
- Base Cabinet Line: Mark the floor's highest point and draw a level line around the room. This ensures all base cabinets sit at the same height.
- Wall Cabinet Line: Standard wall cabinets are installed 18 inches above the countertop, which typically means 54 inches from the floor to the bottom of the cabinet. Mark this line clearly.
- Stud Locations: Mark all stud centers with vertical lines above and below your cabinet lines. This prevents you from missing studs during installation.
If you're installing L-shaped or U-shaped kitchen cabinets, start your layout from the corner and work outward. Corner cabinets should be installed first, as they set the alignment for the rest of the run. For galley kitchen cabinets, ensure both sides are laid out symmetrically for a balanced look.
Don't forget to account for appliance openings and cabinet appliance clearance. Your refrigerator, range, and dishwasher need specific clearances to function properly and for doors to open fully.
3. Wall Cabinet Installation
Wall cabinets are the most challenging part of the installation because they must be perfectly level and securely fastened to the wall. Always install wall cabinets before base cabinets to give yourself room to work.
Step-by-Step Wall Cabinet Installation
- Mark Stud Locations: Use your stud finder and mark all stud centers on the wall where cabinets will be installed.
- Install a Ledger Board: Attach a temporary 1x4 or 2x4 board to the wall at your wall cabinet line. This supports the cabinets while you fasten them, making the job much easier.
- Prepare the First Cabinet: Remove doors and shelves to reduce weight. Drill pilot holes through the cabinet's back rail at stud locations.
- Lift and Position: With a helper, lift the cabinet onto the ledger board. Verify it's level and aligned with your layout marks.
- Fasten to Studs: Drive 2.5-inch cabinet screws through the back rail into the studs. Use at least two screws per stud.
- Check Level: Use your spirit level to confirm the cabinet is level both horizontally and vertically. Adjust with shims if needed.
- Install Remaining Cabinets: Clamp the next cabinet to the first, ensuring faces are flush. Drill pilot holes and screw the cabinets together through the face frames.
- Secure to Wall: Fasten each cabinet to the wall studs as you go.
For corner cabinets, you may need to use a specialized corner cabinet installation technique. These often require blocking behind the drywall for proper support. If you're installing glass front cabinets, take extra care not to overtighten screws, which can crack the glass.
If your cabinets use a French cleat system or rail mounting, follow the manufacturer's instructions carefully. These systems can simplify installation but require precise leveling of the rail.
4. Base Cabinet Installation
Base cabinets are easier to install than wall cabinets because they rest on the floor. However, they still require careful leveling and secure fastening to prevent movement.
Step-by-Step Base Cabinet Installation
- Start at the Corner: If your layout includes a corner, install the corner base cabinet first. This sets the reference point for the entire run.
- Position and Level: Place the cabinet in position and use shims under the corners to level it. Check both side-to-side and front-to-back level.
- Attach to Wall: Drive screws through the cabinet's back rail into wall studs. Use shims behind the cabinet if there's a gap between the cabinet and wall.
- Join Cabinets Together: Clamp adjacent cabinets together, ensuring face frames are flush. Drill pilot holes and screw them together with 1.25-inch screws.
- Check Countertop Height: Standard countertop height is 36 inches from the floor. Verify your cabinets achieve this height consistently.
- Install Remaining Cabinets: Continue working outward from your starting point, checking level and alignment as you go.
For pull-out cabinet shelves and cabinet drawer dividers, install these after the cabinet boxes are secured to avoid damage. If you're adding lazy susan cabinets, ensure the mechanism is properly aligned before final fastening.
When installing cabinets with soft-close hinges and cabinet drawer slides, be careful not to strip the screw holes. If a screw feels loose, fill the hole with a wooden matchstick or toothpick and wood glue, then re-drive the screw.
5. Leveling & Securing Your Cabinets
Proper leveling is critical for both appearance and function. Cabinets that aren't level will have doors that swing open or closed on their own, drawers that slide out, and gaps that look unprofessional. Our cabinet leveling guide provides additional tips for challenging installations.
Leveling Techniques
- Use Shims: Place shims under low corners and behind cabinets where they meet the wall. Score and snap off excess shim material with a utility knife.
- Check Both Directions: Always check level in two directions — side-to-side and front-to-back.
- Use a Long Level: A 4-foot level spanning multiple cabinets gives you the most accurate reading.
- Adjust Cabinet Feet: If your base cabinets have adjustable legs, use these for fine-tuning after the cabinets are in place.
Securing Cabinets
All cabinets must be secured to the wall. Wall cabinets should be screwed into at least two studs. Base cabinets should be secured to the wall and to each other. Use cabinet anti-tip straps for added safety, especially in areas prone to earthquakes.
If you're installing cabinets in a humid environment like a bathroom or laundry room, consider using stainless steel screws to prevent corrosion. For laundry room cabinets and bathroom vanity cabinets, moisture-resistant materials and fasteners are essential.
6. Finishing Touches & Final Adjustments
Once all cabinets are installed and secured, you're ready for the finishing touches that make your installation look professional.
Door and Drawer Adjustment
Reattach all doors and drawers. Adjust hinges to align doors evenly. Most cabinet hinges have adjustment screws for height, depth, and side-to-side movement. Take your time with this step — perfectly aligned doors make a huge difference in the final look. If you notice doors are still misaligned after adjustment, our cabinet door alignment guide can help troubleshoot more complex issues.
Hardware Installation
Install cabinet pulls and knobs using a template to ensure consistent placement. For a complete overview of hardware options, see our cabinet hardware guide. If you're adding under-cabinet lighting, this is the time to run wiring and install fixtures.
Final Cleaning and Protection
Clean all cabinet surfaces with a gentle cleaner. Install cabinet shelf liners to protect shelves and make cleaning easier. Add cabinet bumpers and pads to prevent doors from slamming and to protect your cabinet finish.
For long-term protection, consider our cabinet care and maintenance resources to keep your new cabinets looking beautiful for years.
7. Cabinet Installation Cost Breakdown
Understanding the costs involved helps you budget accurately. Here's what you can expect to pay for professional installation versus DIY:
| Service / Item | Typical Cost |
|---|---|
| Professional Installation (per cabinet) | $50–$100 |
| DIY Installation (tools and materials) | $150–$400 |
| Cabinet Jack or T-Brace | $40–$80 |
| Quality Drill/Driver Set | $100–$250 |
| Cabinet Screws (100-pack) | $15–$30 |
| Shims (100-pack) | $8–$15 |
| Stud Finder | $20–$50 |
| 4-Foot Spirit Level | $25–$60 |
If you're hiring a professional, expect to pay $50–$100 per cabinet, with total installation costs for a typical kitchen (20-30 cabinets) ranging from $1,000–$3,000. DIY installation can save you significant money, but factor in the cost of tools if you don't already own them.
For those considering a full kitchen remodel, our cabinet purchase timeline helps you plan the entire project from ordering to installation. If budget is a concern, explore our affordable cabinet picks and cabinet deals guide.
Recommended Cabinet Installation Tools & Supplies
⚠️ AFFILIATE DISCLOSURE: This website contains affiliate links. As an affiliate Associate, we earn from qualifying purchases. If you make a purchase through these links, we may receive a small commission at no additional cost to you. Read our full affiliate policy.
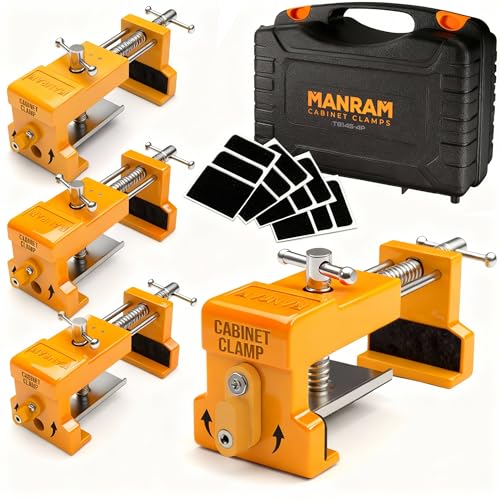
Cabinet Clamps 4 Pack, Face Frame Alignment Tool with Drill Guide | Cabinet Clamps 4 Pack, Heavy Duty Face Frame Alignment Tool with Drill Guide, EVA Pads and Carrying Case for Installation
Check price on Amazon
Cabinet Clamps 2 Pack, Face Frame Alignment Tool with Drill Guide | Cabinet Clamps 2 Pack, Heavy Duty Face Frame Clamps with Drill Guide, EVA Pads and Carrying Case for Cabinet Installation
Check price on Amazon
DAYDOOR Cabinet Clamps for Face Frame Cabinet Installation, 4-Pack | Integrated Drill Guide, EVA Protection, Heavy Duty Claw Clamps, for Cabinet Installation, Blue
Check price on Amazon
King&Charles Cabinet Hardware Jig & Automatic Center Punch Set. | Avoid Jitter Caused by Direct Drilling. Cabinet Handle Jig, Use for Handles and Pulls on Drawers and Doors
Check price on Amazon
PONY 2-Pack Original Cabinet Clamps, 8510 | 650 lbs Load Limit, Designed for Face Frame Cabinet Installation, Ideal for Cabinet Installers, Carpenters & DIYer
Check price on Amazon
Leikius 2PK Steel Cabinet Jacks for Installing Cabinets,14.6-23.6Inches, Adjustable 3rd Hand Support System,Telescopic Hand Support Pole, Third Hand Tools Support Pole 132LB Load for Lifting Drywall
Check price on AmazonFrequently Asked Questions About Cabinet Installation
How long does it take to install kitchen cabinets?
A typical kitchen with 15–20 cabinets takes 1–2 days for a professional installer. DIY installation usually takes 2–4 days, depending on experience and kitchen complexity. Wall cabinets take longer than base cabinets because they require more careful leveling and secure fastening.
Do I need a helper to install cabinets?
Yes, for wall cabinets, a helper is strongly recommended. Wall cabinets are heavy and awkward to lift alone. A cabinet jack or T-brace can help, but having a second person ensures safety and accuracy. Base cabinets can often be installed solo, but a helper makes the job faster.
What if my walls are uneven?
Uneven walls are common, especially in older homes. Use shims behind the cabinets to fill gaps and create a level surface. For significant unevenness, you may need to install a plywood backer board or furring strips to create a flat mounting surface. Our cabinet shims guide covers this in detail.
Can I install cabinets on drywall without studs?
No — wall cabinets must be secured to studs or appropriate blocking. Drywall alone cannot support the weight of loaded cabinets. If studs aren't available where needed, install a plywood backer board spanning multiple studs, then attach cabinets to the backer board. Use cabinet wall anchors only for light-duty applications and never for wall cabinets.
What's the standard height for wall cabinets above countertops?
The standard distance is 18 inches between the countertop and the bottom of wall cabinets. This provides enough clearance for most countertop appliances while keeping cabinets accessible. For kitchens with taller users, 20–22 inches is sometimes preferred. Always check local building codes and consider your specific needs.
How do I ensure cabinets are perfectly level?
Use a 4-foot spirit level spanning multiple cabinets. Check level both horizontally and vertically. Start with the highest point of the floor for base cabinets and work from there. For wall cabinets, a ledger board provides a level starting point. Adjust with shims as needed and recheck frequently. Our cabinet leveling guide offers more detailed techniques.
Should I install wall cabinets or base cabinets first?
Install wall cabinets first. This gives you more room to work and prevents base cabinets from interfering with lifting and positioning wall cabinets. It also allows you to use a ledger board without obstructions.
What type of screws should I use for cabinet installation?
Use #8 or #10 cabinet screws that are 2.5 to 3 inches long for attaching cabinets to wall studs. For joining cabinets together, use 1.25-inch screws. Always use screws designed for cabinet installation — they have wider heads and are less likely to strip. See our cabinet screw types guide for more details.
Final Thoughts on Cabinet Installation
Cabinet installation is a challenging but achievable DIY project. With careful planning, the right tools, and patience, you can save thousands of dollars and gain a deep sense of satisfaction from transforming your kitchen yourself.
Remember to prioritize safety — use proper lifting techniques, wear protective gear, and don't hesitate to call a professional if you encounter structural issues. Before starting your project, review our first cabinet checklist and cabinet buying mistakes to ensure you're fully prepared.
Once your cabinets are installed, explore our cabinet organizer inserts, cabinet spice racks, and cabinet outlet strips to maximize the functionality of your newly installed cabinets. For ongoing care, our cabinet care and maintenance hub has everything you need to keep them looking new.