
Painting a Bathroom Vanity Without Sanding
Transform your bathroom vanity with a durable, factory-like finish—no sanding required. Our step-by-step guide reveals the professional secrets to a flawless result using bonding primers and high-quality topcoats.
START THE PROJECTWhy This Guide Works: Traditional painting advice tells you to sand every surface. But modern bonding primers have changed the game. This guide walks you through the exact products, preparation, and techniques needed to paint your bathroom vanity without sanding—saving you hours of dusty, tedious work while still achieving a finish that lasts for years.
Why Paint a Bathroom Vanity Without Sanding?
Bathroom vanities take a beating. Constant humidity, water splashes, and daily use can leave even the most beautiful vanity looking tired and worn. While replacing a vanity is always an option—and you can explore options like a 30-inch bathroom vanity with sink and backsplash or a 36-inch white bathroom vanity with drawers—painting offers a budget-friendly alternative that can completely transform your bathroom's look for a fraction of the cost.
The problem? Traditional painting methods require extensive sanding to create a surface that paint can adhere to. Sanding is messy, time-consuming, and often impractical in a small bathroom. Fortunately, advances in paint technology mean you can now achieve a professional, durable finish without ever picking up a sanding block. This guide will show you exactly how.
Step-by-Step: Painting Your Vanity Without Sanding
Step 1: Gather Your Materials and Set Up Your Workspace
Before you begin, collect everything you need. Having the right tools on hand makes the process smooth and efficient.
- Bonding Primer: A high-adhesion primer designed for glossy surfaces (e.g., Stix, Kilz Adhesion, or similar).
- Topcoat Paint: A high-quality acrylic or alkyd paint formulated for bathrooms. Satin or semi-gloss finishes are best for moisture resistance.
- Deglosser or Liquid Sandpaper: A chemical solution that etches the surface without sanding.
- Painter's Tape: For masking off walls, floors, and hardware.
- Drop Cloths: To protect your bathroom floor and countertop.
- High-Quality Brushes and Mini Rollers: Foam rollers work well for smooth finishes; angled brushes are ideal for edges and details.
- Painting Tray and Stir Sticks.
- Cleaning Supplies: A degreaser or TSP substitute, and clean rags.
- Screwdriver: To remove doors, drawers, and hardware.
Ventilate your bathroom by opening windows and using a fan. If you're painting a vanity in a small space, consider removing the doors and drawers and painting them in a garage or well-ventilated area. For more ideas on optimizing small bathrooms, see our guide on towel storage solutions for small bathrooms.
Step 2: Remove Doors, Drawers, and Hardware
This step is crucial for a professional-looking finish. Use your screwdriver to carefully remove all doors, drawers, and hardware (knobs, pulls, hinges). Label each piece and its corresponding location with painter's tape or a permanent marker on the back—this will save you headaches when reassembling.
If your vanity has a built-in sink, you'll need to work around it. For vanities with a separate top, like a 25 x 22 vanity top with sink, you may be able to remove the top entirely for easier access. If you're considering an upgrade, a 60-inch double vanity with quartz top offers ample space, but painting your existing vanity is far more budget-friendly.
While hardware is removed, it's a great time to consider an upgrade. New black bathroom vanity with gold hardware combinations are trending, but you can also simply clean and reuse your existing hardware to save money.
Step 3: Clean and Degrease the Surface Thoroughly
Even if you're skipping sanding, you cannot skip cleaning. Bathroom vanities accumulate soap scum, body oils, hairspray, and dust—all of which will prevent paint from adhering properly. Use a degreaser or a TSP substitute to scrub every surface of the vanity, including the inside edges of the cabinet box and the doors.
Pay special attention to areas around the sink and handles, where grime builds up most. After cleaning, wipe everything down with a damp cloth and allow it to dry completely. Any moisture left behind can ruin your primer's bonding ability.
If your vanity has stubborn stains or odors, our guide on cabinet odor neutralizing can help you tackle those issues before painting.
Step 4: Apply a Deglosser (Liquid Sandpaper)
This is the secret weapon that replaces sanding. A deglosser—often called liquid sandpaper—is a chemical solution that softens and etches the existing finish, creating a profile that primer can grip. It's not a cleaner; it's a surface preparer.
Apply the deglosser using a clean rag or sponge, working in small sections. Follow the manufacturer's instructions for dwell time—usually, you apply it, let it sit briefly, then wipe it away before it dries. Work in a well-ventilated area, and wear gloves to protect your skin.
Once the deglosser has been applied and wiped off, allow the surface to dry completely. The vanity should feel slightly tacky or rougher than before—this is exactly what you want.
Step 5: Apply a High-Adhesion Bonding Primer
This is the most important step for a no-sand paint job. A bonding primer is specially formulated to stick to hard, glossy surfaces like factory-finished cabinets, melamine, and even laminate. Not all primers are created equal—look specifically for one labeled "bonding" or "adhesion" primer.
Apply the primer using a brush for edges and corners, and a foam roller for flat surfaces. Work in thin, even coats. Don't try to cover everything in one thick layer—two thin coats are far better than one heavy coat. Allow the primer to dry according to the manufacturer's instructions, then lightly scuff it with a fine-grit sanding sponge if you notice any drips or uneven texture. (Yes, this is a tiny bit of sanding, but it's optional and only for smoothing, not for adhesion.)
For bathrooms, choose a primer that also offers some moisture resistance. If you're painting a vanity in a humid environment, a primer with mold and mildew resistance is a smart choice. Our article on waterproof paint for bathroom cabinets dives deeper into moisture-resistant options.
Step 6: Apply the Topcoat Paint
Now for the fun part—the color! Choose a high-quality paint formulated for bathrooms. Acrylic paints are durable, easy to clean, and resist moisture well. Alkyd (oil-based) paints are also excellent but require longer dry times and strong ventilation. Satin or semi-gloss finishes are ideal for bathrooms because they're scrubbable and resist moisture.
Stir your paint thoroughly (don't shake it, which introduces bubbles). Apply the first coat using the same technique as the primer: brush for edges, roller for flat surfaces. Work in thin, even coats, and maintain a wet edge to avoid lap marks. Let the first coat dry completely, then apply a second coat. For deep or bold colors, a third coat may be necessary.
If you're painting the vanity a light color, consider a white shaker cabinets with glass doors aesthetic for a clean, timeless look. For a darker, more dramatic style, a black bathroom vanity with gold hardware creates a luxurious feel. And if you're considering a full bathroom refresh, our guide on bathroom wall colors with white cabinets can help you coordinate your palette.
Step 7: Reassemble and Enjoy Your "New" Vanity
Once the final coat is completely dry—wait at least 48 to 72 hours before heavy use—carefully reattach your doors, drawers, and hardware. If you upgraded your hardware, now's the time to install it. Rehang the doors and adjust hinges as needed for proper alignment. Our guide on cabinet door alignment can help you get everything sitting perfectly.
Step back and admire your work! You've just transformed your bathroom vanity without the mess and hassle of sanding. To keep your newly painted vanity looking its best, clean it regularly with a soft cloth and mild soap. Avoid abrasive cleaners that can dull the finish.
If you're planning to paint other cabinets in your home—like kitchen cabinets—the same no-sand method can work, but kitchen cabinets often require a more durable finish. For more information, see our article on I want to paint my kitchen cabinets white.
Sanding vs. No-Sand Painting: A Quick Comparison
| Aspect | Traditional Sanding Method | No-Sand Method (Bonding Primer + Deglosser) |
|---|---|---|
| Prep Time | 2–4 hours of sanding | 30–45 minutes of cleaning and deglossing |
| Mess | High (dust everywhere) | Minimal (chemical solution, no dust) |
| Skill Required | Moderate (even sanding is tricky) | Beginner-friendly |
| Durability | Excellent if done properly | Excellent with quality bonding primer |
| Best For | Wood cabinets with existing damage | Factory-finished, laminate, or painted cabinets |
Recommended Products for Painting a Bathroom Vanity Without Sanding
⚠️ AFFILIATE DISCLOSURE: This website contains affiliate links. As an affiliate Associate, we earn from qualifying purchases. If you make a purchase through these links, we may receive a small commission at no additional cost to you. Read our full affiliate policy.

Beyond Paint All-in-One Refinishing Paint, No Sanding, Matte Finish for Cabinets, Countertops, Furniture and Doors, 1 Pint, Bright White
Check price on Amazon
Beyond Paint All-in-One Refinishing Paint, No Sanding, Matte Finish for Cabinets, Countertops, Furniture and Doors, 1 Pint, Sand
Check price on Amazon
Beyond Paint All-in-One Refinishing Paint, No Sanding, Matte Finish for Cabinets, Countertops, Furniture and Doors, 1 Pint, Pebble
Check price on Amazon
Giani Nuvo All-In-One Cabinet Paint Kit (Tidal Haze)
Check price on Amazon
Nuvo Black Deco Cabinet Makeover Kit - Easy DIY 7-Piece Set, Bold Ultra Black, Long-Lasting Finish
Check price on Amazon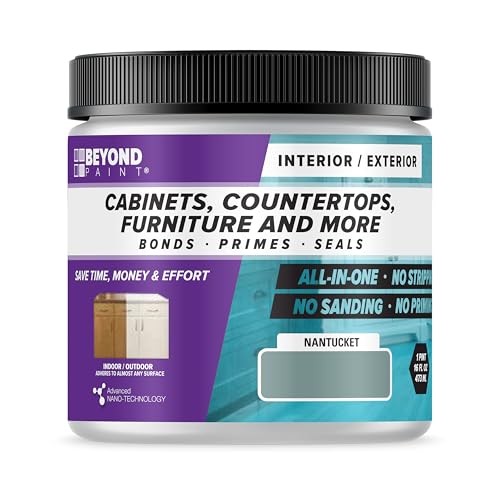
Beyond Paint All-in-One Refinishing Paint, No Sanding, Matte Finish for Cabinets, Countertops, Furniture and Doors, 1 Pint, Nantucket
Check price on Amazon
Giani Nuvo All-In-One Cabinet Paint Kit (Driftwood)
Check price on AmazonFrequently Asked Questions
How long does a no-sand vanity paint job last?
With proper preparation (cleaning, deglossing, and a quality bonding primer), a no-sand paint job can last 5–10 years or more in a bathroom environment. The key is using a topcoat paint specifically formulated for moisture resistance and allowing it to cure fully before use.
Do I really not need to sand at all?
For most modern factory-finished vanities, you can skip sanding entirely if you use a deglosser and a bonding primer. However, if your vanity has peeling paint, deep scratches, or a very glossy finish that's already flaking, some light sanding may be necessary to smooth the surface. In most cases, though, the no-sand method works beautifully.
What's the best paint for a bathroom vanity?
Look for a 100% acrylic paint or an alkyd (oil-based) paint in a satin or semi-gloss finish. Acrylic paints are low-odor, easy to clean up with soap and water, and resist moisture well. Alkyd paints are extremely durable but require mineral spirits for cleanup and have stronger fumes. Both work well when applied over a bonding primer.
Can I paint a laminate or melamine vanity without sanding?
Yes! Laminate and melamine are actually ideal candidates for the no-sand method because they're non-porous and glossy. A deglosser etches the surface, and a bonding primer creates the adhesion needed for paint to stick. Just be sure to clean thoroughly and use a primer specifically designed for hard-to-stick surfaces.
How long should I wait before using my vanity after painting?
Wait at least 48 to 72 hours before reinstalling doors and hardware, and allow a full week before heavy use or cleaning. The paint needs time to cure fully, which is different from drying. During the curing period, avoid placing items on the vanity and keep the area well-ventilated.
Final Thoughts
Painting a bathroom vanity without sanding is one of the most rewarding DIY projects you can tackle. It's affordable, relatively quick, and the transformation is dramatic. By following the steps in this guide—cleaning thoroughly, using a deglosser, applying a bonding primer, and finishing with a high-quality topcoat—you can achieve a durable, beautiful finish that rivals a professional job.
Whether you're updating a dated vanity in a small bathroom or refreshing a large double vanity, the no-sand method opens up a world of color possibilities without the mess. And if you're considering a more extensive bathroom renovation, explore our guides on bathroom storage cabinets and over-the-toilet storage for small spaces to maximize your bathroom's functionality.
Ready to get started? Gather your supplies, pick your color, and give your bathroom the refresh it deserves—no sanding required.