
How to Install Cabinets: A Complete Step-by-Step Guide
Master the art of cabinet installation with our comprehensive guide. Whether you're updating your kitchen or bathroom, learn the professional techniques for a flawless, secure, and level finish.
Installing new cabinets is one of the most rewarding home improvement projects you can undertake. It dramatically transforms the look and functionality of your kitchen or bathroom, and doing it yourself can save you hundreds or even thousands of dollars in labor costs. However, cabinet installation requires precision, patience, and a solid understanding of the process. Unlike simply replacing a cabinet door, a full installation involves structural planning, precise leveling, and secure mounting.
This guide will walk you through every phase of the installation process, from the essential tools you'll need to the final adjustments that ensure your cabinets operate smoothly for years to come. Whether you are installing base cabinets in a small kitchen or hanging wall-mounted units, the core principles remain the same. By the end of this article, you'll have the confidence and knowledge to tackle your project like a seasoned professional.
Before you begin, it's crucial to understand the different types of cabinets you might be working with. If you are planning a full kitchen remodel, you may be considering everything from custom cabinets to shaker white cabinets. The installation method can vary slightly depending on the construction. For example, frameless cabinets (European style) install differently than traditional face-frame cabinets. Additionally, if you are installing cabinets with USB ports or LED lighting, you'll need to plan for electrical work before the cabinets go up. Understanding these nuances will help you avoid costly mistakes.
Essential Tools and Materials for Cabinet Installation
Having the right tools on hand is half the battle. Before you start, gather everything you need to avoid mid-project interruptions. Here is a comprehensive list of what you'll need:
Tools
- Stud Finder: Essential for locating wall studs behind drywall.
- Level (4-foot and 2-foot): A long level is critical for ensuring cabinets are perfectly horizontal and vertical.
- Drill and Driver Bits: A cordless drill with a clutch is ideal for driving screws without stripping them.
- Circular Saw or Oscillating Tool: For cutting shims or modifying cabinets if necessary.
- Tape Measure and Pencil: For accurate marking and measuring.
- Clamps: To hold cabinets together while you screw them.
- Cabinet Jack: A cabinet jack is a lifesaver for holding wall cabinets in place while you secure them, especially if working alone.
- Shims: Wooden shims are used to level cabinets on uneven floors or walls.
- Safety Gear: Safety glasses, work gloves, and a dust mask.
Materials
- Cabinet Screws: Specifically designed for cabinet installation (e.g., #8 x 2-1/2 inch screws).
- Wall Anchors: If you cannot hit a stud, you'll need heavy-duty wall anchors (though it's always best to hit studs).
- Wood Glue: For securing shims and reinforcing joints.
- Finishing Nails or Trim: For covering gaps or adding decorative molding.
When budgeting for your project, keep in mind that if you decide to hire a professional, labor costs can vary widely. For a full kitchen remodel, installation costs might range from $800 to $2,500 or more, depending on the complexity of the job and your location. Doing it yourself can save this entire cost, making it a highly attractive DIY project.
Step 1: Preparation and Planning
Proper preparation is the foundation of a successful installation. Start by emptying the room and removing old cabinets if you are replacing them. Once the walls are bare, inspect them for any damage, warping, or unevenness. Repair any drywall issues before proceeding. Use a stud finder to locate and mark all wall studs. This is non-negotiable; cabinets must be secured to studs to support their weight.
Next, establish a "layout line." This is a horizontal line on the wall that marks the top of your base cabinets. Use your 4-foot level to draw this line, ensuring it is perfectly level. This line will be your reference point for the entire installation. For wall cabinets, you'll also want to draw a line marking their bottom edge. If you are installing a cabinet pantry or a tall tall pantry cabinet, ensure you have enough clearance and that the layout accommodates the height of these units.
If you are installing cabinets in a bathroom, the preparation is similar but often involves working in a tighter space. You might be installing a small bathroom cabinet or a larger double sink vanity. The principles of leveling and stud-finding remain the same, but you'll need to be extra careful with plumbing and electrical lines.
Step 2: Installing Base Cabinets
Base cabinets are installed first because they carry the countertop and often support wall cabinets. Start with a corner cabinet if your layout includes one. This sets the reference point for the rest of the run. If you have a corner cabinet, ensure it is perfectly square and level.
Step-by-Step: Base Cabinet Installation
- Position the First Cabinet: Place your starting cabinet against the wall, aligning its top with your layout line. If you have a cabinet for corners, start there.
- Level and Shim: Use your level to check if the cabinet is level both front-to-back and side-to-side. Slide shims under the cabinet until it is perfectly level. Don't skip this step; an unlevel base cabinet will cause countertop and door alignment issues later.
- Secure to Wall: Drive screws through the cabinet's back rail (the thick strip at the top back of the cabinet) into the wall studs. Use at least two screws per stud.
- Join Cabinets Together: Bring the next cabinet into position. Clamp it to the first cabinet to keep their faces flush. Drill pilot holes and screw them together through the face frames (or through the sides if they are frameless).
- Check and Repeat: Continuously check for level and plumb as you add each cabinet. Adjust shims as needed. For a L-shaped kitchen layout, ensure the corner is perfectly square.
If you are installing a kitchen island or a small kitchen island with cabinets, the process is slightly different. Islands are not attached to a wall, so they must be secured to the floor. You'll need to build a base or use L-brackets to anchor it to the floor joists. This prevents the island from shifting.
Step 3: Installing Wall Cabinets
Wall cabinets are heavier and more challenging to install because they must be held in place while being secured. This is where a cabinet jack becomes invaluable. Always start with a corner wall cabinet or the cabinet that is most constrained by other elements (like a range hood).
Step-by-Step: Wall Cabinet Installation
- Mark Stud Locations: Transfer your stud markings to the inside of the cabinet where the back rail is. Pre-drill pilot holes.
- Position and Support: With a helper or a cabinet jack, lift the cabinet into position. Align its bottom edge with your layout line.
- Level and Shim: Just like base cabinets, check for level. Use shims behind the cabinet against the wall if the wall is uneven.
- Secure to Wall: Drive screws through the cabinet's back rail into the studs. Use at least two screws per stud. Do not fully tighten until you have checked alignment with adjacent cabinets.
- Join to Adjacent Cabinets: Clamp the next cabinet to the first one, ensuring their faces are flush. Screw them together. Repeat the process for the entire run.
For glass kitchen cabinets or glass display cabinets, extra care must be taken to avoid putting stress on the glass. Ensure the cabinet frame is fully supported and level before securing it. If you are installing a cabinet for living room storage, the process is identical to kitchen wall cabinets, but you might want to use decorative screws or covers since they are more visible.
Step 4: Final Adjustments and Finishing
Once all cabinets are installed, it's time for the finishing touches. This is what separates a professional-looking job from an amateur one.
- Door and Drawer Alignment: Check that all doors and drawers close properly and are aligned. Adjust the hinges and drawer slides as needed. Most modern cabinets have adjustable hinges that allow you to tweak the door's position in three dimensions.
- Install Hardware: If you haven't already, install your cabinet handles and knobs. Use a template to ensure consistent placement.
- Add Molding and Trim: Install crown molding or light rail molding to finish the top and bottom of the cabinets. This hides gaps and adds a custom look.
- Caulk and Fill: Caulk any gaps between the cabinets and the wall or ceiling. Fill any screw holes with wood filler and touch up with paint or stain.
- Install Toe Kick: Attach the toe kick to the bottom of the base cabinets. This covers the gap between the cabinet and the floor and the shims.
If you are installing a cabinet pantry or a butler pantry, ensure the doors open fully without hitting any adjacent walls or appliances. For cabinets with doors, check that the doors don't rub against each other when opened simultaneously.
Troubleshooting Common Installation Issues
Even with careful planning, you might encounter some issues. Here are solutions to the most common problems:
- Uneven Walls: This is extremely common. Use shims behind the cabinet's back rail to fill gaps. You may need to scribe the cabinet to the wall for a perfect fit.
- Crooked Doors: Adjust the hinges. Most hinges have screws for vertical, horizontal, and depth adjustment.
- Cabinets Not Flush: If the faces of adjacent cabinets are not flush, use a clamp to pull them together before screwing. If the difference is significant, you may need to plane the edge of the face frame.
- Sagging Shelves: If you are installing pull-out shelves or heavy items, ensure the cabinet is rated for the weight. You may need to add additional support.
When to Call a Professional
While this guide empowers you to DIY, some situations warrant a professional. If your walls are severely out of plumb, if you are dealing with complex electrical or plumbing work, or if you are installing very heavy, high-end custom cabinets, it's wise to hire a professional installer. A professional can ensure the job is done safely and correctly, and they often have insurance to cover any accidental damage. If you are doing a full kitchen remodel, hiring a general contractor to manage the project can save you time and stress, even if you handle some tasks yourself.
Recommended Cabinet Installation Tools & Kits
⚠️ AFFILIATE DISCLOSURE: This website contains affiliate links. As an affiliate Associate, we earn from qualifying purchases. If you make a purchase through these links, we may receive a small commission at no additional cost to you. Read our full affiliate policy.

Ultimate Guide to Cabinets, Shelves & Home Storage Solutions (Creative Homeowner)
Check price on Amazon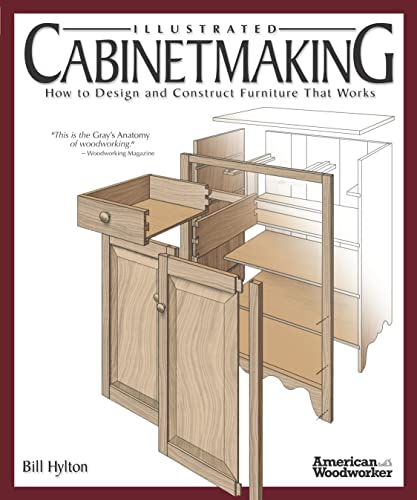
Illustrated Cabinetmaking: How to Design and Construct Furniture That Works - Over 1300 Drawings & Diagrams for Drawers, Tables, Beds, Bookcases, Cabinets, Joints & Subassemblies
Check price on Amazon
Bookcases, Cabinets & Built-Ins: The Maker's Guide to Custom Storage
Check price on Amazon
Building Cabinet from Scratch: A Complete Step-by-Step Guide to Designing, Building, and Installing Kitchen Cabinets, Bathroom Cabinets, and Shelving Systems at Home
Check price on Amazon
How To Make Kitchen Cabinets: Build, Upgrade, and Install Your Own with the Experts at American Woodworker (Fox Chapel Publishing)
Check price on Amazon
How to Make Workbenches & Shop Storage Solutions: 28 Projects to Make Your Workshop More Efficient from the Experts at American Woodworker (Fox Chapel Publishing) Torsion Boxes, Outfeed Tables, & More
Check price on Amazon
How to Construct and Repair Staircases - Install Railings, Balusters, Treads, and Risers: Step-by-Step Instructions for Installing Stair Railings, ... Stairways (Build It Yourself Mastery Series)
Check price on Amazon
Bob Lang's The Complete Kitchen Cabinetmaker, Revised Edition: Shop Drawings and Professional Methods for Designing and Constructing Every Kind of Kitchen and Built-In Cabinet (Fox Chapel Publishing)
Check price on AmazonConclusion
Installing cabinets is a challenging but highly rewarding project. By following this step-by-step guide, you can achieve a professional-looking installation that transforms your space. Remember, the key to success is in the preparation and the details: take your time, measure twice, and always ensure everything is level and secure. Whether you are installing a simple base cabinet or a full set of kitchen cabinets, the skills you've learned here will serve you well. With your new cabinets in place, you can move on to the fun part: organizing and styling your new space.